Monday, April 24, 2017

Final thoughts/ Reflections

     I'm not going to say that I'm now an expert chef. I still have a lot of practicing to do before I would even say I can cook well. But at least I can now respond to the question, "Can you cook?", with an answer like "sort of" or "a little". Before, I would have laughed and responded with "not at all". I've learned a lot of the basics of cooking, as well as having the ability to go to the grocery store and not be completely clueless. I feel comfortable in reading a recipe and putting together a meal. I realize that everything I make isn't going to be perfect and that it takes time and practice to become better. I plan on continuing to learn more recipes and advancing the items I make to the next level. I'd like to create a recipe book and find cost-friendly, healthy recipes. Cooking is time-consuming and expensive though, which can make it hard to fit into a busy schedule. I hope to find ways to add it into my day, whether it be by meal planning ahead of time or by finding fast recipes.
     I've realized the importance of having people to help when testing out a new skill. My major sources turned out to be my mom, my sister, and my friend Sydney. I used my brothers a lot as taste testers for my food. I had a lot of good reviews on what I cooked, but I also had some bad reviews. My brothers are more picky, so things like cooked carrots and broccoli didn't go over well with them. 
     Overall, I really enjoyed this project. I would recommend to anyone learning basic cooking skills. My major problem I had with this project was remembering to document everything and post it to my blog. I immediately wrote things down in my notebook, because I'm more of a pencil/ paper type of person. I'm working on getting better at sharing my material online. My goal is to continue cooking and continue blogging. I want to have my students blog, so I want to continue to use technology to reflect in order to show them the importance of doing so.
     I've yet to get a group together to actually cook a 4-course dinner for, but am hoping to do so at some point soon. When I do get the chance to put together a dinner, I will make guacamole and corn salsa, a regular salad, shrimp tacos (probably chicken too, for those who don't like seafood), and apple crisp with ice cream for dessert. 

Desserts

Now onto the fun things to make! I love desserts, and cooking them was an enjoyable (although time consuming) process.  

Apple Crisp 4/5

I found my recipe for this on a website called Allrecipes. Click here to get the recipe that I followed. The biggest pain about this was peeling and cutting all of the apples. It doesn't look all that great, but it tasted delicious. You definitely have to add vanilla ice cream and caramel sauce to this dessert to finish it off. 

                               BEFORE COOKING                                 FINAL PRODUCT


Homemade Chocolate Chip Cookies

I feel like homemade chocolate chip cookies are a staple to any bakers list of recipes. I wasn't a huge fan of how the cookies turned out, but it could have been because of my oven or because of my baking times. I like the website AllRecipes, and used it again. Click here to find the recipe I used and how to prepare the cookies.


Chocolate Fudge 4.5/5

Allrecipes proved to be an awesome source. You can search anything you want to make and it typically comes up with a recipe. For my fudge, you can click here to find the recipe. I didn't realize how simple fudge is to make! It was probably one of the easiest desserts that I've done.


Chocolate Covered Strawberries 5/5

All I did for these was melt chocolate and dip strawberries in it. I melted the chocolate at one minute intervals, for 4 minutes total. The major problem I came across was that I got water in the chocolate, which caused it to get lumpy. Be careful not to get any water in your melted chocolate and make sure the strawberries are completely dry before dipping them.


Soups/ Salads

Soups and salads aren't something that I make often. I feel like I should incorporate salads more often in order to get my recommended vegetable intake for the day. I chose two salads, a regular garden salad and a strawberry salad. I also picked one soup to make, which is a copycat recipe of Panera's broccoli cheddar soup. Soups are something I want to work on more in the future, because they are easy to throw together and can be cooked during the day in a crock pot.


Strawberry Almond Salad 5/5
For my first salad, I decided to do a strawberry salad. I used spinach, almonds, raspberry vinaigrette, and fresh strawberries. This turned out pretty well. I liked the mixture of the fruity taste with the salad.


Garden Salad 4/5
For my second salad, I chose a regular garden salad. I used iceberg lettuce, cheddar cheese, boiled eggs, Italian dressing, and carrots. I unfortunately forgot to take a picture of this, but it was a pretty easy recipe. The only major thing I had to do was boil the eggs ahead of time. I feel like it's hard to go wrong with a basic salad, so this seemed to go over well with my family. Next time though, I will leave the toppings off of the salad, for people who don't like eggs or carrots on their salad.

Broccoli Cheddar Soup 3/5
For my broccoli soup, I followed a recipe on allrecipes. Click here to get the recipe. This soup wasn't a big hit. I'm not sure where I went wrong when making it, but it didn't seem to be a crowd favorite.


Entrees

I now see why people don't cook... Not only is cooking expensive, it is also time consuming! I'm learning to appreciate good food more though, as I'm cooking it. Besides the hefty price tag (the more ingredients you use, the more expensive it becomes), I actually enjoy cooking. You know exactly what's in your food, and you can adjust the taste of the food to your liking. 
I laugh now looking at my mom's struggle cooking for 5 kids with 5 completely different tastes. I hate green beans, Derek (my oldest brother) hates eggs, Kerrie doesn't like chocolate anything, AJ basically only eats PBJ, pop tarts, and chicken nuggets (keep in mind he's almost 20 years old), and Ryan won't eat anything that AJ won't eat. Yikes! How she ever made dinner that we all ate blows my mind. 
ANYWAYS...
I cooked different entrees and sides for this part of my project. I tried to use multiple different types of meats, but realized that I had no idea what to buy in the grocery store. I used this website for helping picking the best cuts. Before this project, I literally only had cooked chicken and eggs. Now, I can say I've cooked with shrimp, pork, and multiple different types of beef (steaks, roast, ground beef). I've made pizzas, homemade mashed potatoes, used a slow cooker, and have cut up my own veggies. 

Shrimp Tacos 5/5


This was another project done at my friend Sydney's house. She was definitely a big help in this project. She walked me through a lot of the cutting that we did. 

Ingredients
-1 pound bag of shrimp, peeled and no tail
-Soft shell tortillas
-Hot sauce (whatever kind you like)
-Corn and Black bean salsa (recipe can be found on my appetizers page)
-4-cheese blend
-Lettuce

We thawed the shrimp the night before we cooked it. If you don't thaw it ahead of time, you can rinse the shrimp under cold water to thaw it. We cooked the shrimp on the stove, making sure the shrimp were fully cooked. We then heated the tortillas in the microwave for about 20 seconds per tortilla. Add in whatever ingredients you like and you have a delicious shrimp taco!


Pot Roast: 5/5

I think this was my favorite dish to make. The slow cooker allowed for easy clean-up, because I used a slow cooker liner. 

Ingredients:
-2 chuck roast pieces (a little over a pound each)
-Bag of baby carrots
-5 potatoes
-Pot roast Mix Packet
-1 and 1/3 cup of water

The first thing I had to do was brown the pot roast. I did this on medium heat, and did each side for 4 minutes. 

While I was doing this, I washed and cut the potatoes into slices. 


After everything was washed and cut, and the meat was completely "browned" on each side, I put it all in the slow cooker. I mixed the packet and the water together before adding it to the slow cooker. I then added it in with all the ingredients and set the slow cooker to 8 hours. 


This was my final product. The beef was really tender, and it was my favorite meal to eat and to cook. 


Pork, Rice, and Mac N' Cheese 4/5

Okay, I'll admit it. This one wasn't really from scratch. I used the boxed mac n' cheese, and boxed rice. It definitely made my life easier and is a more realistic option. For these, I pretty much just followed the directions on the box. 


The pork was a learning process. I first cooked it on the stove. I seasoned it with a steak and chop seasoning, which I really like. I added olive oil and then cooked the pork chops on each side for 3 minutes. I then put them in the oven on 350 degrees. The timing on this is a little foggy for me. Our oven at my house is a little old, so I had to keep checking the chops to make sure there was no pink. In order to do this, I took them out and cut one of the pork chops in the middle. 


Here is my final product! My mom was a big resource for this one. I kept asking her simple questions like: How do I know this is done? How many people does one box of mac n' cheese feed? How much rice should I make? 


Steak, homemade mashed potatoes, and broccoli 3.5/5

This was a hard one for me to make. I wasn't sure about broccoli timing, I had no idea how to make homemade mashed potatoes, and I've never made steak before. Cooking the steak was difficult, because I had no idea how long to cook it for. 

The first step was buying the steak at the grocery store. I went with a Spencer steak, which turns out to be another name for a ribeye. The cut was great. There was a good amount of marbling (fat) which gave it a really awesome flavor. I first seasoned the steak with steak n' chop seasoning. 


I then browned the steak on each side for 3 minutes per side. I put the pan in the oven on 350 degrees. This was the tricky part. My boyfriend prefers his medium well. So I had to continue to check both steaks to see what their internal temperature was. 


I cooked the broccoli in the oven at 350 degrees. I left it in around 8 minutes to give it a little crispness, making sure to not overcook it. 

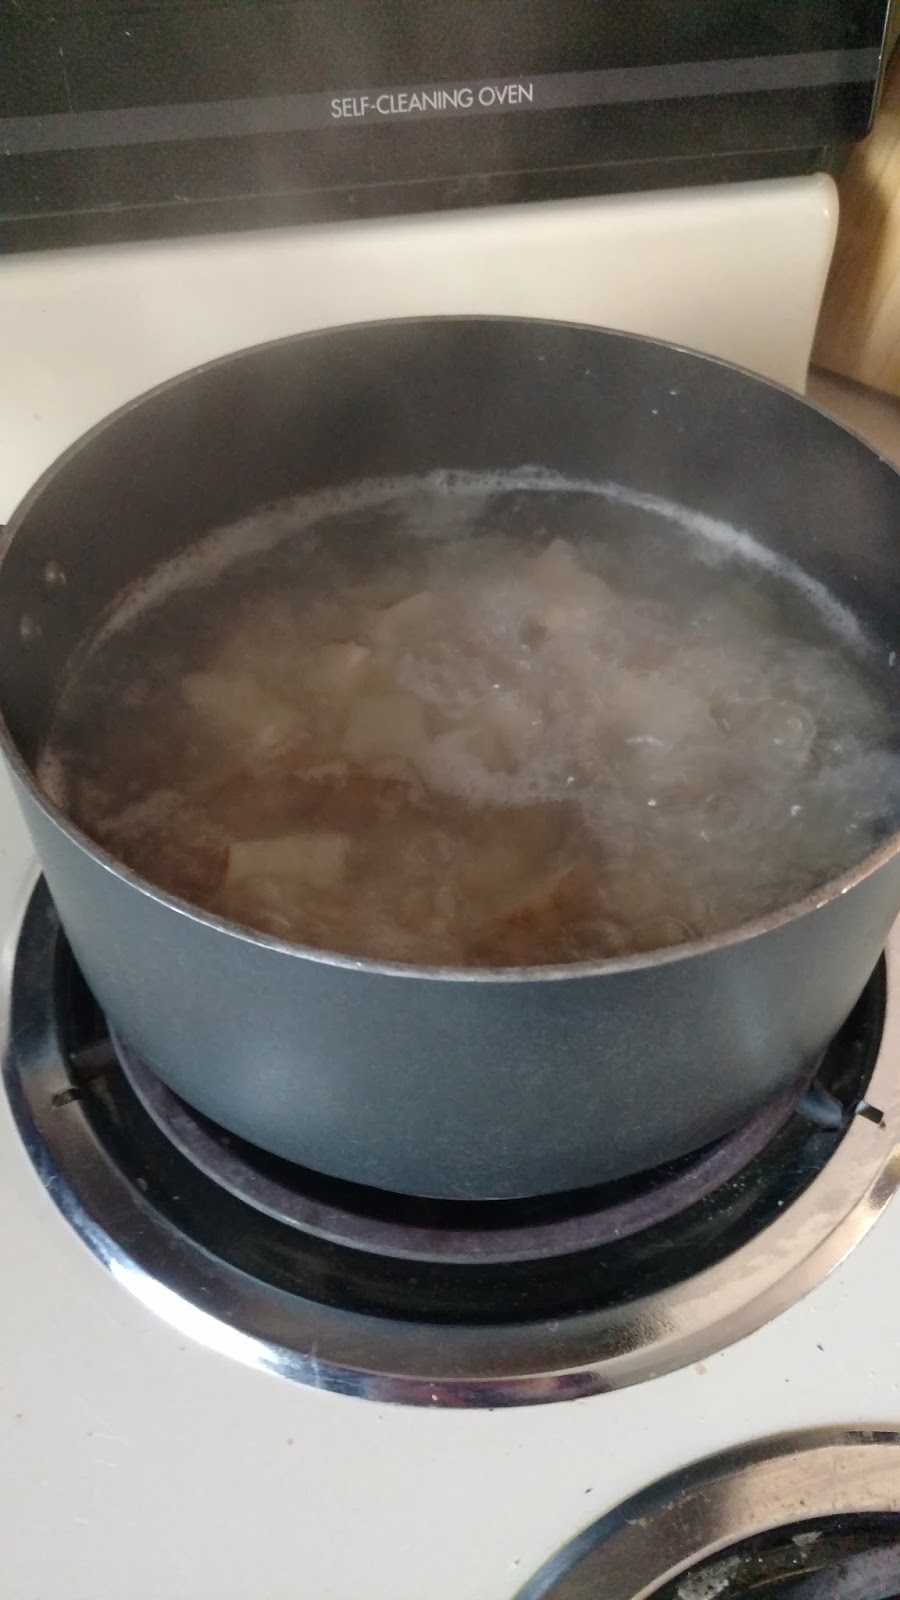
I cut up potatoes and put them in a pan with plenty of water. I cooked them over medium heat, making sure that the water didn't boil over. I let these cook for about an hour. These ended up taking a lot longer than the steak, so if I did this again, I will definitely cook the potatoes ahead of time. 


This was my final product. Not too shabby for a first attempt! I overcooked the medium well steak a little, so I need to keep a better eye on the steaks as they are cooking. 

Appetizers

Okay, so the first thing you learn about cooking when you start to cook is that nothing goes as planned. At least, that was the case for me. My original plans took a nose dive after discovering a few things. One, I don't have a double boiler. I hate to buy one if I don't know that I will use it. So I had to swap the idea of making queso for quacamole. Two, peeling eggs isn't as easy as you would think. My deviled eggs turned into egg salad. And three, no matter how much you follow a recipe, you may have to improvise. Let me know what you think! Side note: I also made egg salad, but didn't take any pictures or write down the recipe. I'm pretty new to this whole blogging thing, so writing every thing down and remembering to document is not easy for me. 

MY CREATIONS:

The first thing that I made was guacamole. My friend Sydney helped me with the ingredients and set up for this. When grocery shopping, Sydney helped me to pick out a ripe avocado. I had no idea what to look for, but she explained it to me. The avocado should be a little squishy, but not super squishy. If it's too hard, it will be too hard to mash.

Guacamole 4/5

Ingredients: 
4 avacados
4 tsp of lime juice
4 tblsp cilantro
a handful of red onion
1 jalepeno
salt to taste

First, we took the pit out of the avacados by cutting them in half and scooped the avocado out. We then mashed them with a fork. We squeezed the juice out of two limes, cut up some red onion, cut a jalepeno (making sure to take the seeds out), added cilantro, and mixed it all in with the mashed avocados. We then added salt, a little bit at a time, and mixed it in. We continually added salt until we liked the way the guacamole tasted.

TACO PIZZA 3.5/5

Next, I made taco pizza. I followed a recipe from LivingWellMom for this. On her website, she does a really great job walking you through the cooking process.


Ingredients

2 tubes refrigerated crescent rolls
1 package cream cheese, softened
1 cup sour cream
1 pound ground beef or ground turkey
1 envelope taco seasoning mix
1 medium tomato, chopped
1 cup shredded cheddar cheese
1 cup shredded mozzarella cheese
1 cup shredded lettuce

I'll let you go to LivingWellMom's website to get the rest of the recipe. I don't want to take credit for something I didn't create! I really thought it was an easy recipe to follow and was easy to make. I liked the flavor, but my brother-in-law said it would have been much better with taco sauce. My timing on taking it out wasn't great, so the crust was cold when I served it. 


Homemade Pizza 2.5/5

I originally was planning on doing more of flatbread pizza, and following the recipe from Carrie's Experimental Kitchen. However, things didn't go as planned, so I improvised. I used too small of a pan, so my "flatbread" turned into a thick crust pizza. I also didn't have a lot of the ingredients for the first recipe (mayonaise and garlic were main ingredients that I thought we had in the kitchen, only to find out we didn't have them). I found pizza sauce in the cupboard, so decided to make a more traditional pizza. 


I set the oven to 350 degrees and let it preheat. I spread the dough out into the pan. I added some olive oil to the dough. I then cooked it for 10 minutes. It didn't seem to be fully cooked at that point, so I put it back in for 5 more minutes. I then added the pizza sauce, cut up tomatoes, plenty of mozzarella cheese, and basil. I baked it for another 15 minutes. 
I didn't like how this one turned out. I don't think the dough cooked all the way in some spots. The flavor also wasn't all that great. I think adding pepperoni or black olives (some other type of flavor) could have helped. My brothers and mom also didn't really like this recipe. The term "bland" came up a lot when describing it. 


Black Bean and Corn Salsa 4/5

This was an improvised recipe. My friend Sydney (who also helped with the guacamole) helped with this one. I liked the flavor of it! I'm excited to share this with you all. 


Ingredients:

3 cans of black beans
2 cans of corn
Diced red onion (we used about a handful)
Cilantro (again, about a handful) 
1/2 a jalepeno
Lemon and Lime Juice (juice from a small lemon and a small lime)
Salt and Pepper to taste

We basically just cut everything up and mixed it together! Make sure to drain the juice from the black beans and corn.

Sunday, April 23, 2017

Technology and Productivity

     Technology can definitely be used to help me become a more productive teacher. It can help me with grading, so I have more time to spend with students. It can help me to let students work at their own pace, instead of all at one pace. It can also help me to keep things more organized and allow for more effective communication with students and with parents. There are many, many other ways technology can be used.
     I can also use technology to help solve problems. As Jake mentioned in the Powerpoint presentation, technology is not the goal of the lesson, but a tool used to solve a problem or to meet a goal. We can increase student engagement, communication, and interest by incorporating technology. If a student is behind, we can use technology to let them work at their own pace. We can find tutorials on YouTube to help learn how to do/use different tools. We can also use technology to find others' who have more experience and can help with our teaching methods. Personally, I can find interesting ways to teach lessons to my students by reading what others have done in the past. I can also learn about different technology tools by reading blogs and watching videos. I can increase my organization and time management by using technological tools. Students will hopefully be more interested in learning, and will be more focused. Parents will be better connected to me and to their students learning process. By keeping a blog, parents can read it to see what we are learning in my classroom each week.
     I see myself using multiple productivity tools. The article, 9 Smart Productivity Hacks for Teachers, lists some tools I will likely use. I will use PlanBoard (or something similar) to plan my lessons on. Instead of having everything written in a notebook, I can stay organized through the use of an app. I will use the Google system for students to communicate with me and eachother easily. I will use GoogleDocs for easy grading and feedback of written assignments. This video discusses Google for Education and it's uses in the classroom. I will likely use YouTube to either post videos or to find videos that are relevant to my material. I may use Zaption, or something similar to help students stay engaged with videos. I also want to formatively assess my students during any lectures I may do, so things like Turning Tech or Kahoot will be tools I will use in my classroom. There are so many things you can do with technology that I could go on and on. Technology can be used in many ways, and can increase both teacher and student productivity in the classroom.

Saturday, April 22, 2017

Blended Learning

     We have used blended learning a lot in our technology class. For those of you who don't know what blended learning is, this website provides a lot of good information on the topic. I think it has been effective in teaching me different technological tools. The cool tool reviews have provided me insight into the different applications that are available to us to improve our teaching. We also have used blogs and twitter to share information. I think this is something that is important to learn how to do, because blogs help you to reflect on material learned. By reading others' blogs, we can also gain additional insight into other teachers' thoughts on different topics.
     I feel that our technology class could have been more blended, where we watched videos before class instead of during. We could then use class time to discuss different topics and our thoughts on the topics.
     I personally think blended learning should be implemented more in the classroom. Station rotation can be used in younger students to prevent boredom. Lab rotation would be awesome for me as a future science educator. I also really like the flipped classroom style and plan to use it in my own classroom. Having students learn material online and use class time for discussion and reflection can help students stay interested and motivated. I also think using blogs to reflect on knowledge can be beneficial for students.
     Stacy Hawthorne discussed with us how blended learning changed the students attitudes towards the classroom. Technology in the classroom can help to raise the achievement bar. Having a relationship with the students also is important to help them learn.
     Stacy is a fantastic source for blended learning information, having worked with schools and districts across the US to develop blended learning styles. She tells us that in a blending learning model, students have to have control over time, place, path, and pace. There are four types of blended learning models. The first is the rotation model (which includes station rotation, lab rotation, flipped classroom, and individual rotation). The second is the flex model, which is where students have complete flexibility. The next is enriched virtual, and the last is a self-blend model.
     If there is not any institutional support, you should use the station rotation model. This is easy to implement. Flipped is also common for teachers. Self-blend is common for students who go to a traditional school but take online classes.
     One major thing that I took away from Stacy's presentation was that it is important to not get hung up on the definition blended learning. You can use lab rotation and flipped rotation at the same time. She also talked about the importance of really knowing your online technology. She also mentioned that if you don't 100 percent know what you're doing with a certain piece of technology, you shouldn't add the technology to your classroom.
     Blended learning is very personal to the teacher, to your students, and to your subject. You can find pieces and parts to blend. You can determine whether to blend just a particular unit, or the whole year. You have to think about how much support students will need in the classroom. The main reason to go to a blended learning format is in order to create a better relationship with students and to improve achievement.
     The article, Five Reasons Blended Learning Fails, discusses the different problems that can occur with blended learning. These problems include: programs starting too fast, no staff buy-in, students that don't feel invested, tools that aren't chosen strategically, and not changing the org chart. Keeping the failures in mind can help us to achieve the best success with our blended learning models.

Monday, April 17, 2017

Formative Assessment

  • What is your philosophy on assessment? 
     My philosophy on assessment is that formative assessment is incredibly important. Assessing students as they are learning the material is necessary to see how well students are performing. 
Rick Wormeli tells us that formative assessment has the greatest impact on student achievement. Kids can learn without grades but they can not learn without a formative assessment. If we focus on summative assessment, students don't learn as well. 
     When we focus less on grades and focus more on formatively assessing students, we see an increase in student achievement and mastery. Alfie Kohn discusses all of the negative impacts of grades on student achievement. He tells us that grades reduce the students interest in learning itself, reduce students preference for challenging tasks, and reduce the quality of students thinking. While I think deadlines are necessary to make sure students stay focused on the task at hand, I don't see the importance in grades. I agree that our focus should be more on formative assessment and students success and achievement, instead of summative assessments and grades.
  • What are your impressions about the 2 formative assessment technologies (PearDeck & EduCanon) Scott shared?
     PearDeck is an interactive presentation which engages students using a polling system. I think this is a good technique to use to see if students are understanding concepts during the learning process. We can use polls to see the percentage of the class that knows an answer. We can also have students write definitions or answers to questions and submit them to the teacher. I would like to use something along the lines of PearDeck when doing any lectures to my students to be sure that they are understanding the material being presented. 
     EduCanon is a great source to help teachers flip their classrooms. Interactive questions can be added to videos to help teachers gauge students learning. I really like this tool a lot. I'm a big proponent for the flipped classroom style and I think a tool like this can be very beneficial in students learning process. The teacher can tell by looking at responses that students learning is taking place. 
  • What was the most striking thing you took away from Scott's presentation? How will it impact your own learning?
     Scott really highlighted the importance between formative and summative assessments. He also showed us in the video two different tools to use for formative assessment during the learning process. PearDeck and EduCanon are two tools that I will likely use in the future. When it comes to my own learning, I will try to start taking tests/ doing practice problems during the learning process instead of after. 
     Scott also brought up many other topics related to formative assessments. Knowing the standards for what I am teaching is incredibly important. Pre-assessing students is also something that Scott talked about. By giving a pre-assessment, we can see what students know and don't know. Socrative was also discussed. It can be used to quiz students and to give us results regarding each question on the quiz. We can then analyze our teaching style and students' learning using the results given. This was another handy tool that he presented us with that I will more than likely use in my teaching. 


Sunday, April 9, 2017

Final Cool Tool Review: Bitstrips

Overall, I would definitely not recommend the use of Bitstrips in the classroom. Besides inappropriate content and language, the application is not uploading my bitmojis to my computer from my cell phone. Read on to learn more:

What is the tool that you have chosen? What does it do? What else do you know about it?

     The tool that I have chosen to use is Bitstrips. It is a comic character creator. I know that it is commonly used by high school and college students. When I originally picked this application to review, I thought that you could make comic strips with it. I realize through working with the app that you can't create your own comics. You can only use the comics that they have given to you. There are multiple different comic pictures that you can choose from. They can depict your current mood, can send someone a message (such as wishing them happy birthday or telling them thanks), or can tell people what you are currently doing.

How might you use the tool in the classroom? Think about TPACK and link your example to it.

     I wouldn't use this particular tool in the classroom. I like the idea of creating an avatar, but this particular tool may not be appropriate in the classroom. Things like comics that give the middle finger and comics that use cuss words would make this inappropriate for classroom use.

     Having an avatar that looks similar to yourself could be useful in the virtual world, so students could potentially use this application to create a bitmoji for use as a profile picture. We can relate this to TPACK by incorporating the avatar into usage in the technology framework. Many students may want to have online discussions about content, but don't want to use their own face as the main user in order to protect privacy. An avatar could increase technological communications in students.

Why would you use the tool in the classroom? Again, think about TPACK:)

Again, I would use this tool to create an avatar. I think students feel more comfortable participating in online discussions with an avatar as their profile picture. This relates to the technology component of TPACK. We can relate this to content knowledge because we could have online discussions using the Bitmoji characters. I don't think students will get enough out of this application for it to be worth using in the classroom. As discussed before, this may be a good application concept, but the app itself is more for use outside of the classroom due to the inappropriate nature of the application.

Could students use this app to create their own digital media artifacts? What makes it easy to use? What would challenge students?

Students could definitely use this to create their own avatar! It's super user friendly. You first create a character that depicts you, then you get to dress the character. It's meant to be a public application, with the ability to create an avatar easily. Picking a classroom appropriate comic may be something that students would struggle to do. Another major issue that I ran into was uploading my bitmojis to my computer from my phone. I tried sending them via Facebook and email, but the upload failed. Students may run into the same issue when creating an avatar.

Link to the website where the app can be accessed or downloaded.

This is an android application, but a link to the website can be found at http://www.bitstrips.com/

Learning Space in the Classroom

How can space (“learning space”) encourage student engagement and learning?

     Learning space can absolutely encourage and also discourage engagement and learning. A good learning space can increase attention span and engagement while a bad learning space can do the opposite. Later, I will discuss how challenging traditional learning spaces can increase student learning.
     In her video, Holli Tonyan discusses "Campfires in Cyberspace". She talks about the four different areas that need to be in a space, whether it be in person or virtual instruction. The campfire is the first area, which is where storytelling (lecture) takes place. The second, the watering hole, is where the discussion occurs. Thirdly, there is the cave. In the cave, we encourage reflective learning done by students. Lastly, we have the mountain top, which is where students tell everyone what they know and also relate learning to the world. Overall, we need students to be able to listen and learn, discuss, reflect, and share their learning. These are the four needs that have to be met to encourage successful learning and retention of information.

What role can Google Apps for Education (GAFE) play in the development of learning spaces?

Google Apps for Education can help develop online learning spaces. The website, Google for Education, lists reasons why we should use GAFE. First off, it is a free resource. Secondly, you can use it on any device. It also allows for easy collaboration on documents and projects. Also, communicating is easy on this system. Personally, I like to use the google apps that the University of Akron provides for us. Using it for powerpoints, word documents, and worksheets is easy and free for me to use.

What assumptions should we challenge as we design learning spaces for the future?  
   
     We should challenge the traditional classroom assumptions when designing new learning spaces. As discussed in the video "Flexible Learning Environments", we need to focus on keeping students comfortable. By having movable chairs, carpets, comfortable places to sit, places to lie down, places to stand, and the ability to move around, the students are more engaged in what the teacher is saying. This video also encourages teachers to give up control when it comes to the traditional learning environment and let students take the lead on their learning process.
     The video "Project-based Learning at High Tech High" also challenges traditional stereotypes and thoughts. The head of this school shows the benefits of having smart classrooms with technology available in many different ways. The school has all glass windows instead of traditional walls. The school also incorporates students of all socioeconomic statuses and encourages all students to pursue further education past high school.
     The article, "Designing the 21st Century K-12 Classroom" lists six things that all classrooms should have. This list includes: desks and furniture that support collaboration, ample electrical outlets, a "smart" teacher lectern, lighting that is easy to control, physical space that goes outside of the classroom, and fewer expansive gathering areas. This list is pretty comprehensive and incorporates technology as well as group learning.

How does The University of Akron's campus currently approach the design and development of informal learning spaces?

     The University of Akron's campus is currently working towards designing and developing new informal learning spaces. The library is the learning "hub" for learning outside of the classroom. There are multiple computers, which include both Macs and PCs for people who have different preferences. There are also multiple meeting rooms that include projectors in order for students to have group study sessions and meetings. The library has a lot of outlets, including some built into the tables. There is a Starbucks with food and coffee which supports using the library as a meeting place. There are booths for comfort and more traditional chairs for easy mobility which support group work. I think that the University of Akron is doing well in supporting the use of technology in education.

How well do the informal learning spaces on UA campus align with your needs and expectations as a learner? 

     I would say overall, the informal learning spaces meet my needs and expectations pretty well. I have used meeting rooms for group study sessions, I like to use the student union sometimes when I want a more open environment with lots of people. I like going to the library because there are quiet areas upstairs that help me to focus. The only thing that I would say needs improved is the amount of computers in the library. I often use the computers and during the week, especially close to the end of the semester, there are no open computers. It can be frustrating when I can't get on a computer in order to do homework or study. Other than that, I really like The University of Akron's set-up.


Tuesday, April 4, 2017

Cool Tool Review: Camtasia


What is the tool that you have chosen? What does it do? What else do you know about it?

The tool that I chose to review this week is called Camtasia. Camtasia is a pretty awesome tool, and has a lot of different functions. The main purpose that I would use Camtasia for is for screencasting. Lectures can be recorded using Camtasia and downloaded to different media outlets (Youtube, etc.) for students to view. Using this software, you can edit and create videos. There is no limit to the length of videos recorded on Camtasia. I found the software to be user friendly, and would definitely use it in the future.
The major downfall to this program is the cost. In order to buy the unlimited software, there is a charge of 199$. If I found myself creating videos and screencasts often, I would find the software to be worth the price. However, at the current moment, it isn't economically advantageous for me to buy the program. I did, however, enjoy the free 30 day trial that they offer.
This video, released by TechSmith, gives a run down on Camtasia and it's uses.

How and why might you use the tool in the classroom?

I would use this tool in order to create a flipped classroom. I would have students watch videos ahead of time created using Camtasia. I could then use class time to have discussions, do projects, and have students reflect on the material. I really like the idea of a flipped classroom, and hope that tools like Camtasia can help this become a major concept in my future classes.

Could students use this app to create their own digital media artifacts? What makes it easy to use? What would challenge students?

I wouldn't have students use this to create their own artifacts. This comes down to the cost of the program. I found it to be user friendly and really liked the program; however, I would have students use free software to create videos. Overall, I really enjoyed using this program. I would recommend at least trying the free 30 day trial to those who are unsure about spending the money on the program.